Creating a Stage: Difference between revisions
Jump to navigation
Jump to search
No edit summary |
No edit summary |
||
| Line 2: | Line 2: | ||
1. On the Mapping tab, click the Stages… button | 1. On the Mapping tab, click the Stages… button | ||
[[file:Createstage.png]] | [[file:Createstage.png]] | ||
| Line 9: | Line 8: | ||
3. Enter a meaningful Stage Name, select Stage Type, and select the destination Table (where data will be Inserted or Updated), then click OK. A description of these options are listed below. | 3. Enter a meaningful Stage Name, select Stage Type, and select the destination Table (where data will be Inserted or Updated), then click OK. A description of these options are listed below. | ||
[[file:Stageoptions.png]] | [[file:Stageoptions.png]] | ||
4. The New Stage should now be displayed in the list on the left. | 4. The New Stage should now be displayed in the list on the left. | ||
[[file:Newstagewindow.png]] | [[file:Newstagewindow.png]] | ||
5. Repeat steps 2-4 for each additional stage. | 5. Repeat steps 2-4 for each additional stage. | ||
Latest revision as of 19:47, 5 November 2014
The Mapping tab is where Stage, Exec Operations and Data field mapping is configured.
1. On the Mapping tab, click the Stages… button
2. In the Stages dialog window, click the ![]() button
button
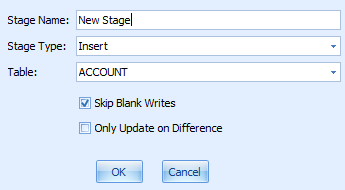
3. Enter a meaningful Stage Name, select Stage Type, and select the destination Table (where data will be Inserted or Updated), then click OK. A description of these options are listed below.
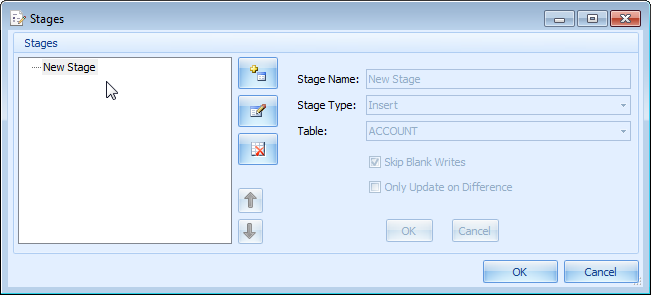
4. The New Stage should now be displayed in the list on the left.
5. Repeat steps 2-4 for each additional stage.


