Running Jobs: Difference between revisions
Jump to navigation
Jump to search
No edit summary |
No edit summary |
||
| Line 2: | Line 2: | ||
1. Deploy the current configuration to the Web Service. | 1. Deploy the current configuration to the Web Service. | ||
2. On the General tab, select the Job that you want to run from the drop-down. | 2. On the General tab, select the Job that you want to run from the drop-down. | ||
3. Click the Run Job tab. | 3. Click the Run Job tab. | ||
4. Configure the | |||
4. Configure the [[Run Options|Options]] for the run. | |||
5. Click the Start button. The status box should show “Running” and will display in real-time, the # of Origin Rows processed. | 5. Click the Start button. The status box should show “Running” and will display in real-time, the # of Origin Rows processed. | ||
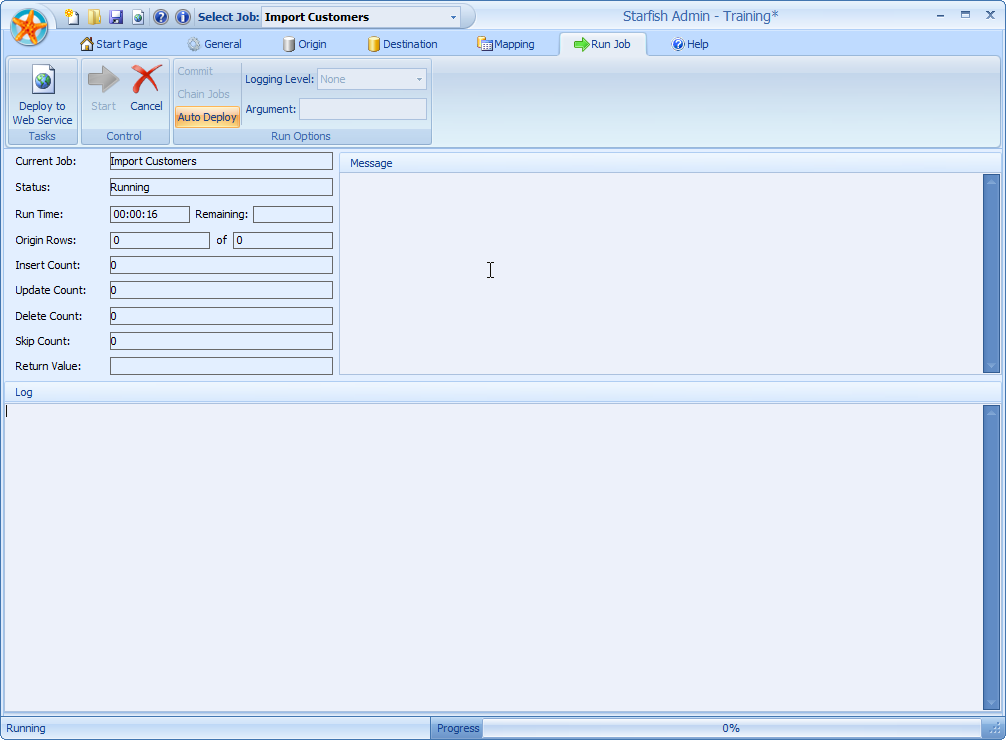
The Message box will display any error messages encountered during the run. The Log box will display the entire log for the Job run (when it’s finished), depending on the Logging Level specified at the beginning of the run. | The Message box will display any error messages encountered during the run. The Log box will display the entire log for the Job run (when it’s finished), depending on the Logging Level specified at the beginning of the run. | ||
[[File:Runningjobs.png]] | [[File:Runningjobs.png]] | ||
Latest revision as of 19:22, 5 November 2014
If you wish to run a Job directly from the Starfish Admin, follow the steps below.
1. Deploy the current configuration to the Web Service.
2. On the General tab, select the Job that you want to run from the drop-down.
3. Click the Run Job tab.
4. Configure the Options for the run.
5. Click the Start button. The status box should show “Running” and will display in real-time, the # of Origin Rows processed.
The Message box will display any error messages encountered during the run. The Log box will display the entire log for the Job run (when it’s finished), depending on the Logging Level specified at the beginning of the run.
